9 Design Mistakes Beginners Make with Camper Van Conversions
Last updated Feb 2022
You have subscribed to the coolest van youtubers, spend hours flicking through beautiful insta feeds of remote locations framed by van doors trimmed with timber and lace – and your dream is to Travel Australia by Van …you have the vanlife bug.
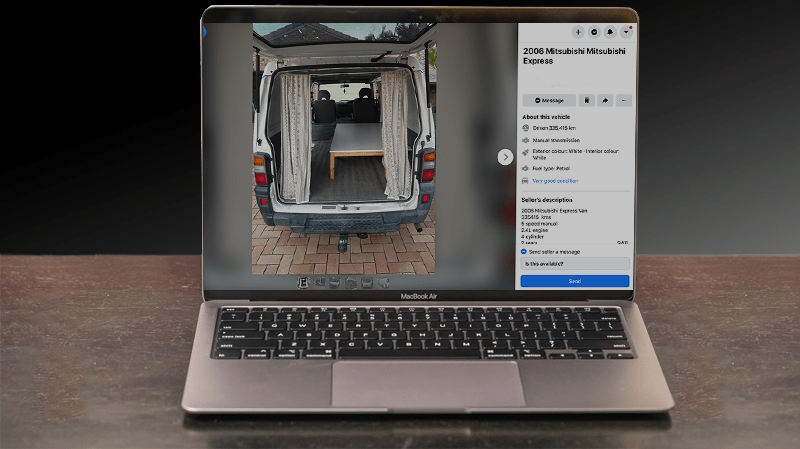
After a year of cutting back on your favourite breakfast spot, replacing uber rides with a scooter, and learning to love the taste of instant coffee, you now have an ex-courier van parked out the front just waiting to become the van home of your dreams. Sure it isn’t as big as a Sprinter van, and you can still see the courier’s name where the stickers were, but if you had saved for a Sprinter, you would be fifty and need the extra space for the grandkids.
Scrolling through your pins, there are hot showers, LED down-lights, bike racks and hammocks – these are small apartments on wheels, complete with plantlife, coffeemakers and induction hobs. You have several pins with murphy beds folding out of the way to allow for the yoga space.
I also pin those, pore over those insta feeds, and stop everything to watch my favourite youtubers’ new post.
I have also converted a van into a camper – several times in fact, with varying vans and budgets – but what is more important is that I have lived in these conversions, and have learnt a lot about the process of van conversion, particularly in Australia.
So here are nine mistakes I have seen repeated by people converting a van into a camper van.
1. Design in stone
Not actual stone, but absolutes setting your design in stone. If you are new to vanlife, there will be many understandable misconceptions in converting your lifestyle from one of large spaces and infinite resources (think water, power and ablutions) to a minimalist existence. There will be many things that you think are necessary that aren’t, and conversely, many things you don’t consider necessary that are a must.
The best way to discover these is by doing – living in an in-between design without all the finishes for a period before you settle for a final design. Call it a practice design, or even better, an ongoing refinement as you learn to live in the space.
An example of this is the type of bed …sure you can overnight in a hammock, maybe even last a week – but there is a reason most houses don’t have hooks for hammocks.
The same goes for thin mattresses with joins in them that are a nifty conversion from the settee, or the couple who plan to sleep on a single size mattress. What is fun to start with gets unbearable in the airless heat of an Australian summer.
Another recurring error is the height of bed …doing the worm to bed each night so you can fit the two mountain bikes, paragliding gear and inflatable boat (we have one of these) beneath it is fine until you are six months into your trip and haven’t used any of it because your new physiotherapist advises against exacerbating your bad back caused by doing the worm. You should be able to sit up in bed, see point 4.
2. Try to fit everything inside

This is by far the biggest rookie mistake I see repeatedly. I take it as an attempt never to have to go outside. Again let’s go to Pinterest and look at the numerous mini vans converted to a camper complete with kitchen, dining, bathroom and study, albeit scaled down to dollhouse proportions.
Ultimately there really only needs to be a bed and storage for a van to qualify as a camper, and you could be surprised with how well that works if within that storage you have chairs, table, stove, cooking gear, shower bag and towel.
However, there are refinements that can make living in a camper easier, which doesn’t involve shrinking a house into the space. These can differ greatly when taking into account the climate – there will be more days hiding from the cold in Winter in the southern parts than in the north of Australia. That said, the absolute majority of the time (which is all you can design to), can be extended to cooking and eating outside. Not only does this free up valuable space inside, it is a far more enjoyable place to cook (and eat), doesn’t spread food smells inside your living area, and very importantly in hot weather, add heat to your already hot interior.
3. Don’t have a bed to just fall into
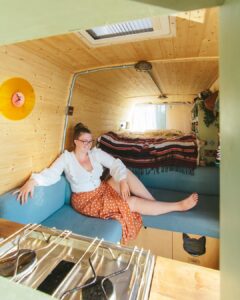
Have you noticed the career vanlifers on social media ALL have permanent beds?
They know the comfort of memory foam mattresses and the value of a good sleep when the rest of their world is a compromise.
A bed that folds out from a settee might work for a two-week holiday, but the novelty wears off when you are doing it day-after-day, month after month. Add to the equation having to fold it out and make the bed while in a sketchy neighbourhood whilst in stealth mode or in pouring rain, and you see the logic behind it.
This isn’t so much a design issue, but at the same end of the spectrum, I have watched innumerous couples pull up to campsites and proceed to transfer all sorts of items from their bed to the front seat. I am talking guitars, suitcases, backpacks, cardboard boxes, surfboards and gaming consoles …and mostly combinations of these things. Imagine them in the pouring rain for the second week straight having to do that? Imagine pulling up after a long drive through that persistent rain, only wanting to go to sleep, and having to do that? …what an awful thought.
In any campervan design, there will be compromises required. Experience from many tells us that we are more comfortable not taking as much so we can have a readymade bed waiting for us as night falls.
4. Have nowhere to just lounge

Vanlife involves a lot of lying about – reading, watching a movie, waiting for a ferry or a shop to open …or just sitting out a rainy day or two. This space needs to be weather proof, comfortable for all the occupants and not involve complicated setup, or anything external to the van – in other words being able to move. If your van is big enough, a separate settee that can double as dining/desk seating for a fold out table is ideal. For smaller van conversions, the ability to fold the bed up into a settee works well – the kombi bed/seat conversion is an example – but for most small vans, leaving the bed as it is makes the most sense. This can be improved with angled cabinetry to counter the van wall’s curve for a way to lounge on the bed comfortably whilst keeping it as a bed (see point 3).
5. Look like a camper
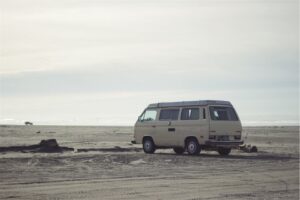
The beauty of vanlife in Australia is the diversity of locations – there are large, sophisticated cities, beautiful townships, and a whole lot of vast, empty spaces in between. What this means to van design is there is always space to find somewhere to park for the night – if you don’t look like a camper.
There is a lot already written online about stealth camping, but for the new van builder, the main point is not to look like a camper, which means not having roof racks with pods, solar panels and awnings hanging off them, as well as the obvious signs like propane gas doors, water filling points and Greenpeace stickers (buy the shirts – they make more money out of those anyway).
Standalone awnings have come a long way, like this one from Offroading Gear, or this compact one from Haskia, and don’t require permanent mounting. Solar panels need not be high profile – check out this 200W Renogy Panel. As to pods, rethink the storage inside your van …and your packing list.
6. Overcomplicate the solution
Many things seem like a good idea when imagining van life, but until you have travelled in your van, in the areas you will travel, you will find it hard to predict what requirements you will have. For instance, some places you travel will have the weather and geography to supplement showers with swimming in fresh water, while somewhere else relies upon the water onboard, and is too precious to waste on hygiene.
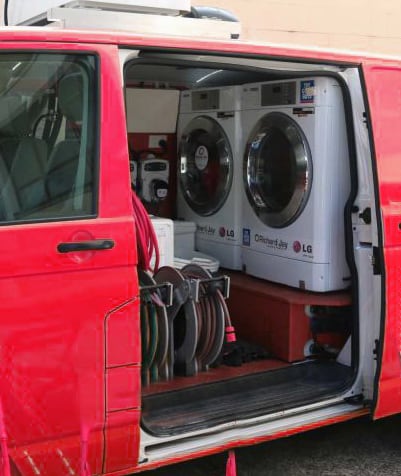
The same goes for products supposedly made for van life, like a portable washing machine. Unless you have boundless storage (…and no one ever does), a washing machine that doesn’t fold flat is going to take up a lot of room, outweighing any benefit it may have. We use Laundromats for sheets and general clothes, but have a Scrubba (or this one) for underwear, which we squeeze out with a microfibre towel, then hang on a portable clothesline. All up they all take up less space than a pair of jeans.
The same goes for the ubiquitous solar shower. We have owned a few for the various vans and boats over the years, but our latest solution is by far the most convenient. From trial and error, we know that boiling a billy (Australian camp kettle for our overseas readers) of water added to a bucket of cold water gives us the right temperature for a nice shower, and for convenience (and taking up little space), we use a rechargeable shower system . One bucket (…and we use creek water when we can to save good freshwater) will give us both a nice long shower, screened by a shower curtain attached with magnetic hooks to the back door of the van. Actually – those magnetic hooks are amazingly versatile for all sorts of things.
Depending on where you are traveling, public toilets can be an option for all but the middle of the night ablutions. These can be catered for easily, whilst conserving space, with a bottle and a “urination device” for those that need it. These days, with a lot of owners renting out their properties to self-contained campers, a toilet shelter and small portable toilet meet the requirements.
7. Stay in the sun to keep those solar panels charging
There are certainly advantages to having your (discreet, see point 5) solar panels mounted on your roof. It is a perfect place to store them, and they can be working most of the daylight hours. The main disadvantage is when you find the prime spot to spend a few days not running your engine; you need to park them in the sun to get power, heating up your van.
When mounting them, devise a system of detaching them from the roof so they can be placed in the sun while your van is shaded using an Anderson plug extension lead.
8. Underestimate the power of power
I personally consider the most civilized addition to a camper van (or boat) is refrigeration. To have a fridge is to have enough power to run it, which means having a separate battery to the van battery. It is called a house battery, as opposed to the van’s crank, or starter, battery. These are measured in Amp Hours or Watt Hours, and calculating the amount you will require based on what you use is very important. As batteries vary so much, including the amount of discharge they handle, do your research.
There are two ways to add power to your van – the most economical is using a Dual Battery setup which allows the van’s alternator (along with solar) to charge both batteries but, very importantly, isolate the draw from running the fridge, charging laptops, etc from the starter battery. This means you are able to start your van even if you have drained your house battery. If for some reason (leaving the lights on perhaps), your starter battery is flat; you can also flick a switch and start your van with the house battery. Nice huh?
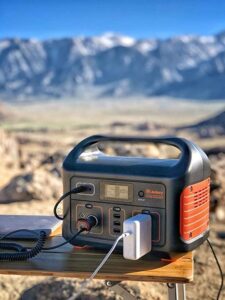
The other, more elegant way, is to use a (strangely named) solar generator, which is effectively a portable battery pack complete with charge controller and outputs to run your fridge, charge phones, drones and laptops, etc. whilst being charged by either your van alternator (through the lighter plug) and/or solar panels. They even have a built in inverter for your AC appliances. These don’t need to be hard wired into the system, and you would be very surprised with how often you will take it out of it’s cradle and use it.
9. Disregard weight
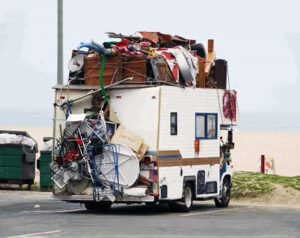
It is easy to get carried away with constructing a van without due consideration of weight. It is not like you have to carry the weight on your back.
Vans have a maximum weight when deigning their suspension, steering, brakes, axles, transmissions and overall structure. While it is unlikely you will ever have to weigh your van to see if it is within the legal limit, you will suffer for an overweight build with fuel economy, handling, and wear on tyres and suspension.
The same applies to uneven distribution of weight across the chassis, like grouping the heavy items (like water and batteries) along one side. The worst example I have seen, and more than once, are people lining their ceilings with second hand floorboards, adding a great deal of weight up high and creating a rollover risk. The ideal location for any necessary weight is low and over the axle.
Consider the materials you add. Cabinetry does not require 16mm plywood; floors or backsplashes do not need to be tiled, and beds do not need to be constructed of hardwood beams.
In summary
I am creating a simple step-by-step minivan (like a Hiace, iLoad or Express) conversion plan, complete with cutting plans, buying list, etc that is achievable with the minimum of tools and expertise. It will include a permanent bed with economical drawers underneath maximizing storage (and with secret storage for valuables) and lounging capability. I will also include removable solar panel mounts and an optional composting toilet drawer.
Subscribe here if you would like to be updated when it is out.

Travel Australia by Van
Dreaming of the ultimate Aussie Vanlife – traveling Australia by van? For a big country, you need to plan big. Makes the perfect gift for anyone who loves to travel, from the first timer to the seasoned. At 6” x9” it is the perfect balance between size and convenience to be able to fit into a backpack pocket while still being able to record a lot of information – you wouldn’t want to forget anything!
LEARN MORE>>